Jewelry Manufacturing Process

STEP 1 – DESIGNING

This is the first and very important step. The jewelry designer thinks of a design for the jewelry. It’s like imagining a picture of what the jewelry should look like. This could be a new style for a ring, a necklace, or any other type of jewelry. The designer considers different shapes, sizes, and how the gemstones will look in the design.

STEP 2 – CAD/CAM/HANDMAKING

The second stage, just after the designing stage is the CAD/CAM stage, which involves the use of CAD Software. The CAD Software is a 3D computer-aided software often used by designers which improves the dimensional accuracy and quality of the design. Also, it helps in the creation of a database for manufacturing. When the task of designing a concept gets completed by the jewellery designer, and the same is being created on the paper and designed at the system. This process of conversion of ‘concept on paper’ to the ‘system’ is done through the CAD Software, or the Computer Aided Designing technology. The CAM or the Computer Aided Manufacture software is a software which takes care of the process of machining and manufacturing, or simply we can say, to automate the manufacturing process.

Step 3 – CUSTOMER APPROVAL

  1. Initial Design Discussion: We and client discuss the design concept, preferences, gemstone choices, metal types, and any special features desired.

  2. CAD Design Creation: Based on the discussion, Our skilled designer creates a 3D CAD model of the jewelry piece using specialized software.

  3. CAD Presentation: The CAD file is shared with Our client, either through email or a secure online platform, accompanied by detailed images and angles.

  4. Client Review: Our client carefully reviews the CAD design, examining it from various viewpoints to ensure it matches their vision. They consider details like proportions, gemstone placement, and overall aesthetics.

  5. Feedback and Revisions: If any changes are requested, the client provides specific feedback on the design elements they’d like to adjust or modify.

  6. CAD Revisions: We revises the CAD design based on the client’s feedback, making the necessary adjustments while ensuring the design integrity is maintained.

  7. Updated CAD Presentation: The modified CAD design is presented to Our client again for review. This step might involve multiple iterations until the design aligns perfectly with Our client’s vision.

  8. Final Approval: Once Our client is completely satisfied with the CAD design, they provide their final approval, indicating their readiness to proceed with the physical creation.

Step 4 – MODEL MAKING

After the design is thought of, the next step is to make a model. This is like creating a mini version of the jewelry out of materials like wax or clay, or using computer software. This model shows what the final jewelry will look like in real life.

Step 5 – RUBBER MOULD

Moving into the fourth stage, we encounter the pivotal Rubber Mould phase, which assumes a central role in the production process. The Rubber Mould stage is instrumental in crafting numerous pieces of jewelry sharing the same exquisite design. The remarkable advantage of utilizing rubber moulds lies in their ability to securely harbor, shield, and encapsulate the intricate designs, thereby facilitating the production of faithful replicas of the jewelry design in subsequent endeavors. The fabrication of these moulds involves a range of materials, spanning from natural rubber and silicone to even metal, and the technique employed for mould creation is known as ‘Vulcanizing’. This method ensures a robust and accurate reproduction of the original design, preserving its artistic integrity and ensuring the potential for crafting timeless jewelry pieces in the times ahead.

Step 6 – WAXING / WAX TREE

In the jewelry manufacturing process, after creating rubber molds from a silver master, wax pieces are produced. This involves using a commercial wax injector machine to inject wax into the rubber molds, forming wax models. These models are then attached to a wax stem in a process called ‘treeing,’ where each piece is connected at a roughly 45-degree angle. Lighter items are placed at the top and heavier ones at the bottom, creating a ‘tree’ structure used for casting.

Step 7 – CASTING

Metal casting involves melting metals like gold, silver, or platinum and pouring them into the prepared mold. Once the metal cools and solidifies, it takes the shape of the jewelry design.In SILVERGEMSTONE jewelry manufacturing, the casting stage involves skilled casters placing the wax tree in a steel flask, covering it with a chemical powder slurry that solidifies in an hour. The flask is then heated in an electric furnace, melting the wax and leaving a cavity in the shape of the tree. Molten metal is poured into this cavity and allowed to cool. Once cooled, the cast is broken open to reveal the jewelry piece

Step 8 – GRINDING

The grinding is the next stage involved in the process of jewellery manufacturing. The grinding involves the use of polisher which is used to grind off the nub (A nub is resulted after the process of casting; once the raw casting is clipped off from the casting tree and appears at the place where the spruce was attached with the gold piece!). The polisher utilizes the motorized grinding machine to smoothen the surface of gold piece of the jewellery. The Grinding involves the final process of the polishing, which is carried out by holding the jewellery piece against the spinning grinding wheel and thus resulting a smooth surface as required.

Step 9 – FILING / ASSEMBLY AND PRE POLISHING

The Filing is the next stage involved in the process of the jewellery manufacturing. Under Filing, the excess metal or solder is being removed from the piece. The variety of tools like files and burns are being utilized to remove casting layer and offering a smooth finish. After filing, the task of assembling is carried out which is the process of joining 2 or more components of same design using soldering technique or laser technique.

Afterwards, the polishing is being carried out to give a neat and fine finish and thus enhancing the value of the jewellery piece. There are three steps involved in the polishing stage, which includes the tumbling, pre-polishing and ultra cleaning. You must note that before the diamond is set, those jewellery pieces bearing diamond, requires pre-polishing, since the diamond portions can’t be polished once the diamonds are set below the area, as it may risk the shine of the diamond.

Step 10 – GEMSTONE SETTING/ GEMSTONE ASSORTING

The gemstone assorting process is a methodical and crucial step in jewelry production that involves categorizing and selecting gemstones based on various criteria. Here’s a concise overview of the process:

In the gemstone sorting process for jewelry making, we first visually inspect gemstones for color, size, shape, and clarity. We then grade them by color for consistency and assess their clarity for any internal or external flaws. Gemstones are matched by size and shape, ensuring uniformity and balanced aesthetics in the final piece. They are segregated by quality tiers and selected for specific roles, like center or accent stones. For symmetrical designs, like earrings, we pair gemstones with consistent attributes. Finally, we group them based on design requirements and customer preferences, readying them for jewelry creation.

Step 11 – POLISHING

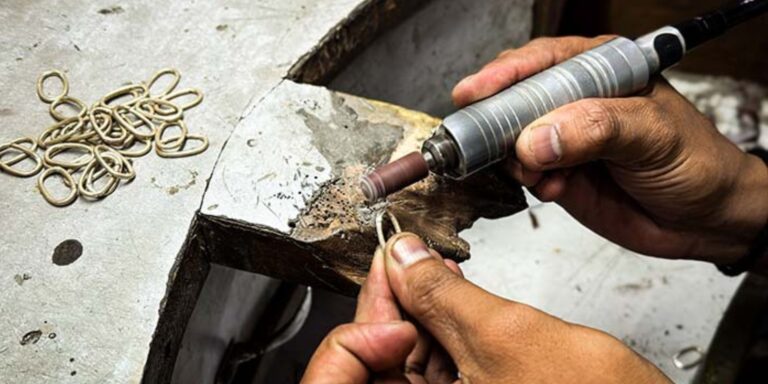
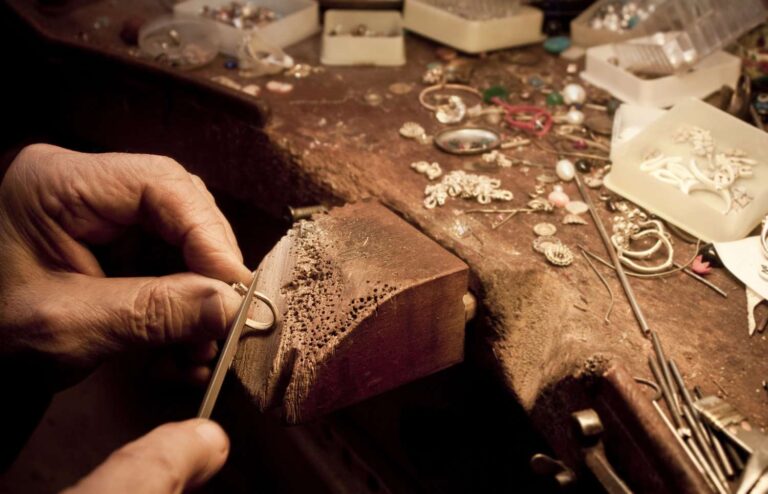
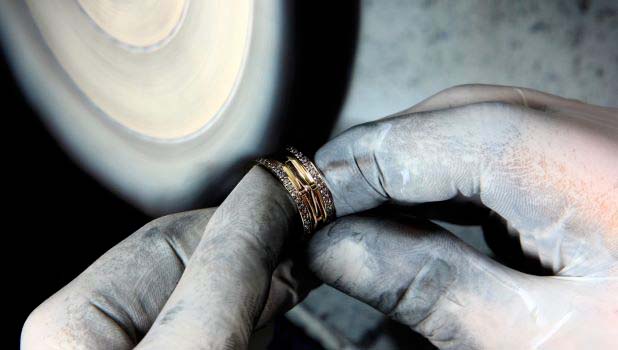
In the final polishing stage of jewelry manufacturing, the jewelry is polished to enhance its shine, usually after the stones are set. This can be done manually or with a machine, using tools like soft buff, solid buff, hair buff, and various others for different purposes, such as imparting shine, removing casting layers, or smoothing roughness

Step 12 – RHODIUM PLATING

Rhodium plating, the last stage in jewelry manufacturing, involves coating jewelry with Rhodium, a white precious metal that enhances scratch and tarnish resistance. It is applied to yellow gold to create appealing designs and to white gold to increase its whiteness, as pure white gold is not naturally very white.

Step 13 – QUALITY CONTROL

As the journey of jewelry creation at SilverGemstone.com reaches its final stage, we encounter the crucial phase of quality control, which holds an integral position alongside the earlier stages. Quality control stands as a cornerstone to ensure that the ultimate jewelry piece crafted meticulously aligns with the stringent quality guidelines and standard requisites set in place.

The tenet of quality control is rooted in its ability to ascertain that the final product exudes not only visual appeal but also the highest levels of workmanship and excellence. This stage of scrutiny is executed through a trio of vital methods: measurement, visual inspection, and mechanical inspection.

Under the method of measurement, precise tools are employed to gauge and verify the dimensional accuracy of each jewelry piece, ensuring it meets the designated specifications. Visual inspection, as the name implies, involves a meticulous examination to validate the precision of craftsmanship and ensure an impeccable finish. Meanwhile, the mechanical inspection entails a comprehensive assessment of the jewelry’s mechanical components, affirming their functionality and structural integrity.

With these rigorous quality control methodologies in place, SilverGemstone.com ensures that every jewelry creation not only embodies exceptional aesthetics but also embodies a steadfast commitment to uncompromising quality. This commitment echoes through every facet of the jewelry crafting process, culminating in pieces that stand as reflections of dedication and artistry.